Earth Day seems like an appropriate time to post this DIY for pantry risers! I’ve had some Styrofoam blocks sitting in my garage for a while now, since I can’t bring myself to throw them away and have been looking for a way to re-use them. You’ve likely come across these before–they’re usually packed around electronic equipment and other items that are fragile and need insulation during shipping. They protect stuff, but they are also garbage and end up in landfills and the ocean and don’t biodegrade, which is a huge bummer.
Anyway, I was recently rummaging in my deep IKEA kitchen cabinets looking for a can of pineapple and inspiration struck–I could use the Styrofoam blocks as risers in my cabinets!
This is a super easy project. My Styrofoam pieces were pretty long, so I just needed to cut them in a single place to make them the length I wanted. They are easy to cut, too. The only downside–the little bits that come off where you cut them cling to everything, so I recommend wiping them up with something wet, otherwise they can scatter and grab on to the nearest piece of fabric.
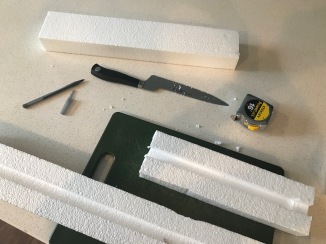 Tools I used for this project:
- Styrofoam blocks (I think you can purchase these at a craft store, but please recycle old pieces if you have them. If you’re paying money for materials, I’m sure there’s something better suited for risers that’s more eco-friendly)
- Sharp knife (I used a serrated bread knife and it worked nicely)
- Cutting board
- Measuring tape
- Pen for marking measurements
Measure the inside width of your cabinet, then measure and mark that on your Styrofoam. I added a couple of millimeters so that I could wedge the pieces in and they wouldn’t move around. Cut the Styrofoam and place it in your cabinet. That’s it!


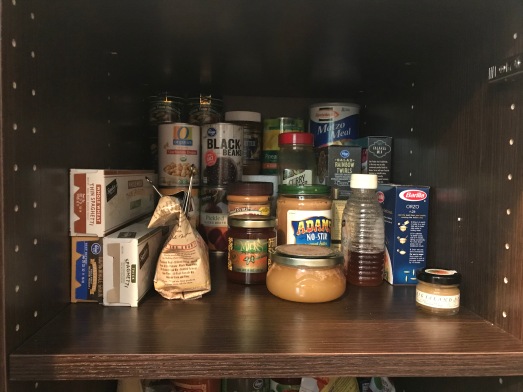
I put in a few layers to make my back row taller, and if you’re stacking these you may want to glue them together or wrap a piece of packing tape around them. Since I didn’t want to bother with that, I made my pieces just a smidge wider so they would wedge into place and not move or tip over.
This project took all of 20 minutes, and I can finally see all of the food at the back of my cabinet. No more hunting for things or having them expire before I get a chance to use them. Yay!