Have you ever had a tiled surface that had grout that was a weird, gross, or boring color? Did you think you needed to re-grout it to change it? I did, so I lived with the grout color on our kitchen backsplash for ages, until I stumbled upon grout stain. You paint it over the existing grout, and it stains it a new color!
When we originally installed our cool hexagon tile kitchen backsplash, we used a light grout color. The end result was that the hex tiles all blended together so you couldn’t really see their neat shape. Staining the grout a darker color really makes them pop now, and was totally worth the effort.
And when I say effort, it was… yeah, a lot of work. It took the two of us most of a day to complete. But, depending on how much surface area you’re working with, and the type of tile you have, this job will likely be easier for you. We had a lot of wall to work with, and our tiles are marble, which are porous and hung on to the stain quite a bit. Glazed ceramic tiles are much easier to wipe off and work with.
Tools used for this project:
- Polyblend Grout Renew (purchased at Home Depot)
- Nitrile gloves to protect our hands
- Foam brushes
- Kitchen sponges with a scrubby side & soft sponge side
- Painter’s tape
- Dropcloth to protect counter top
We started by removing the shelves on our wall, and taping off around the edges with the painter’s tape. I then used a little dish soap, water, and a sponge to wash the wall to remove any residue on the tiles and grout. I also laid down newspaper along the counter so the drips wouldn’t stain the counter top. Guess what? The wet newspaper ended up transferring the newsprint onto the counter tops, so don’t do this! We ended up swapping out the paper mid-project for some plastic sheeting and dropcloths we had on hand.
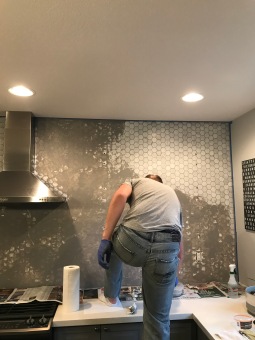 The product instructions say to rub the grout stain just on the grout and leave on for 30-60 minutes. Since we had small tiles and painting this stuff on just the grout lines would have been painstaking, we ended up painting it on the grout AND the tiles–much easier to cover a large surface that way. The trade-off was having to scrub the grout stain off of the tiles. That’s where the rough, scrubby side of the kitchen sponges came in handy–they were rough enough to get the grout stain off the tile, but didn’t scratch the marble or damage it. By the time we’d painted our way across the wall with the grout stain, it was time to go back to where we started and scrub it off. It definitely took some elbow grease to get it off the tiles, but it stuck to the grout brilliantly, and it looked just as we’d hoped it would!
The grout stain says it has a sealer built into it, but I ended up using some Sealer’s Choice on the tiled area behind our stove for some extra protection, since we’d just scrubbed the tiles a bunch and a lot of cooking oil gets splattered there.
Here’s the before and after!



 Tools I used for this project:

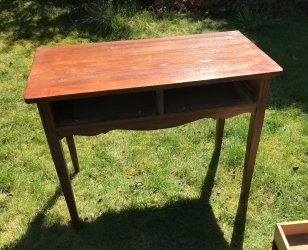
 I started by sanding off all of the red stain. Make sure you’re wearing some glasses and a mask to cover your nose and mouth, otherwise you’ll eat the sawdust you kick up. The palm sander with a piece of very coarse sandpaper in it worked really well. I followed up with the multi-tool which has a triangular-shaped sanding part on it to reach into the joints and more detailed areas.


